This is NOT a full tutorial on setting up and using the SquareLine Studio UI Editor as there are plenty of online resources and videos on using the software. The focus instead will be on how to integrate the UI designed in SqaureLine Studio into the WeatherSense 9001 Arduino-ESP32 project code.
Projects, videos and instructional blog posts like this take a lot of effort to research and produce. I have over 100 hours in this project so far. If this has been helpful or interesting, please consider a donation to help offset the extensive time and effort I put into these projects. Your support for small creators like me is greatly appreciated. Also, it has been shown that donating will allow much positive karma, fortune and mojo to come your way.
The first comment will be to assure something that should already be in place if you downloaded my GitHub code for the WeatherSense 9001 project. The file gfxconf.h must exist in the root project folder of the Arduino code. The pertinent CrowPanel_xx macro must be set correctly in gfxconf.h to match the CrowPanel you are using (ie 5.0″, 7.0″)
Second, the file lv_conf.h must exist in the Arduino library folder. Be sure to enable any font sizes in lv_conf.h that you may have installed.
Assure you download the SquareLine files from GitHub:
https://github.com/bobotmedia/WeatherSense9001-CrowPanel7/tree/main/SquareLine
Copy the entire WeatherSense9001-CrowPanel7 folder with all contained files into your local SquareLine Studio project folder. Typically this folder is located in C:\Users\<yourusername>\SquareLine\Projects\
Create the Projects folder if needed.
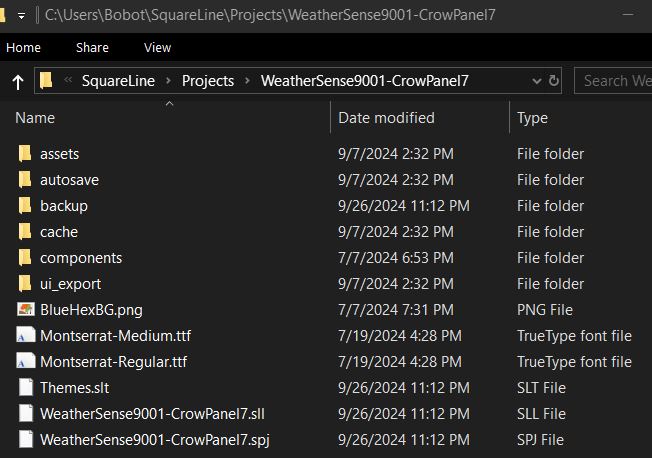
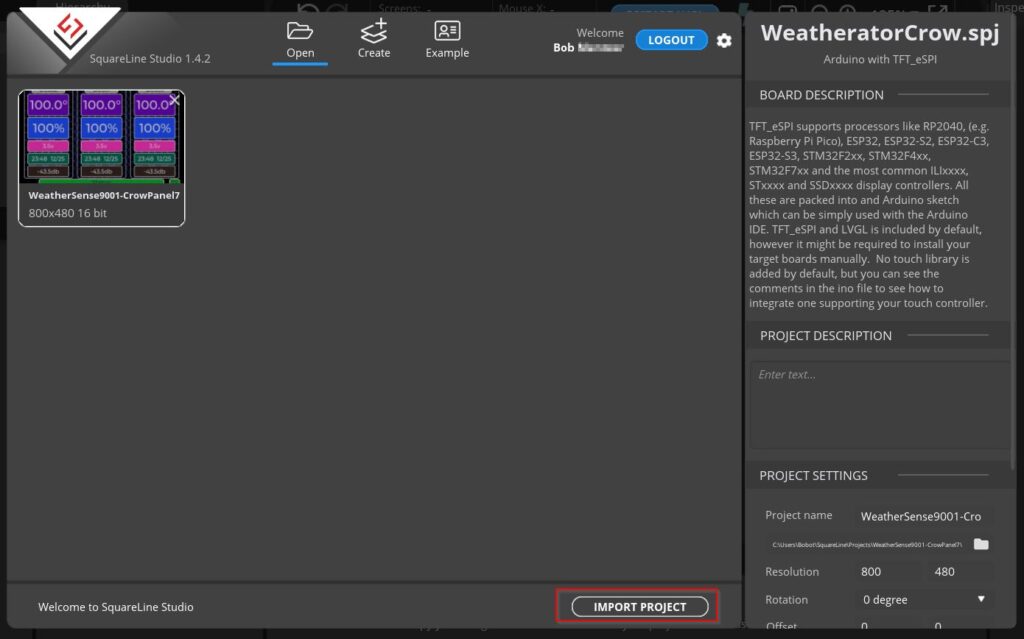
At this point, you should have already installed and licensed the SquareLine Studio UI Editor. After launching SquareLine Studio, Import the appropriate SquareLine Studio project file (.spj) that you copied above (ie C:\Users\<yourusername>\SquareLine\Projects\WeatherSense9001-CrowPanel7\WeatherSense9001-CrowPanel7.spj)
The imported project should show on your main SquareLine Studio projects screen. Double-click the project to open it.
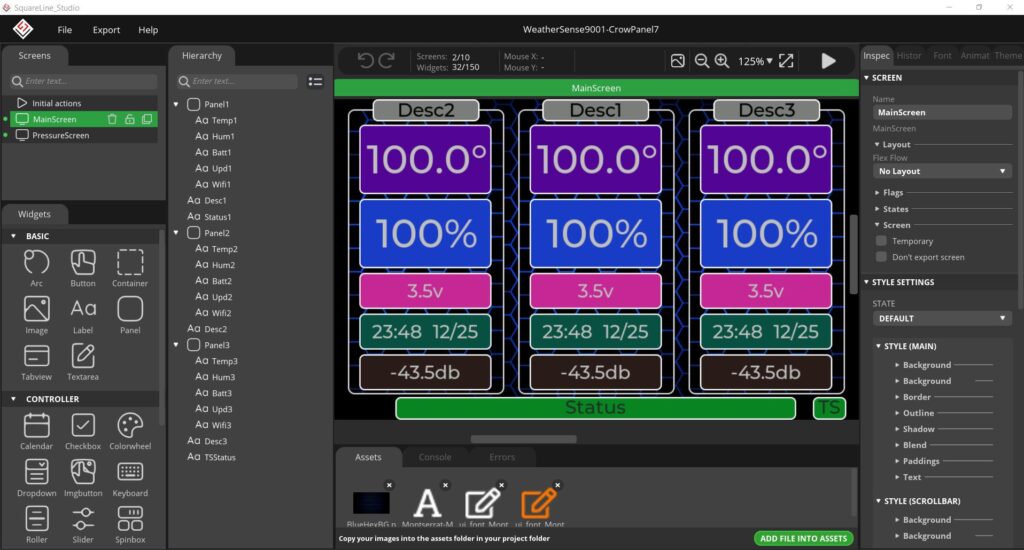
Again, this is NOT a SquareLine Studio tutorial. However the below is a typical screen that you would encounter while designing the UI for a project, namely the WeatherSense 9001 for CrowPanel.
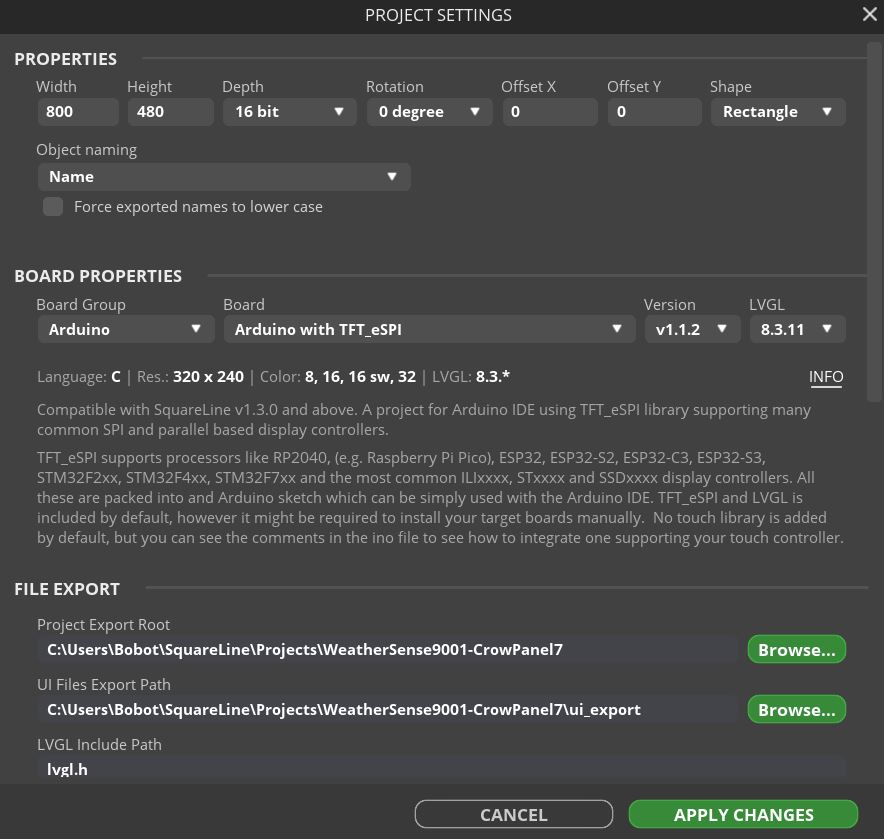
Now would a great time to check the Project Settings from the File menu.
Assure that the settings and versions in the panel below match those in your setup.
Take special note of the File Export paths at the bottom. I had to change mine from what was already in the GitHub project settings.
Point the Project Export Root to your SquareLine project folder and point the UI Files Export Path to a created ui_export folder contained within. This is the folder where the UI files will be exported to in the next step.
At this point you would typically edit the UI screens and widgets for your project. The work is already done for this WeatherSense 9001 project.
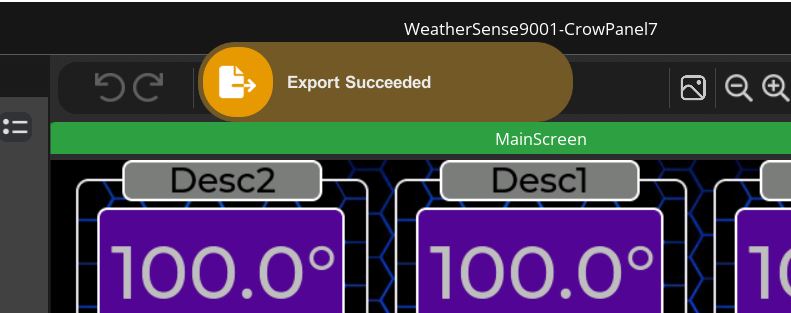
Click the Export menu and choose Export UI Files. The UI files have been exported to the ui_export folder you designated in the Project Settings above.
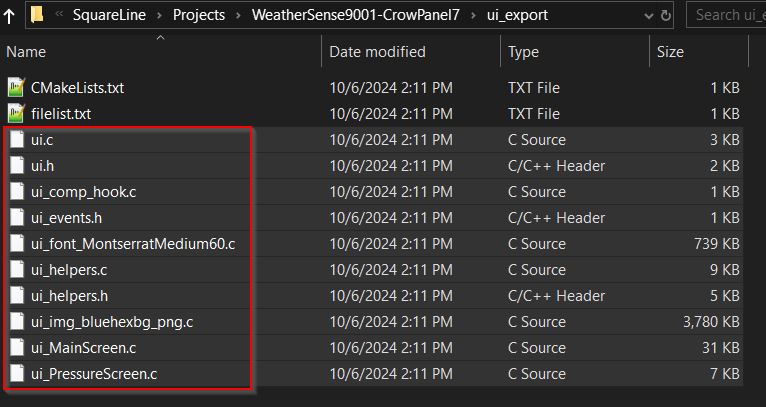
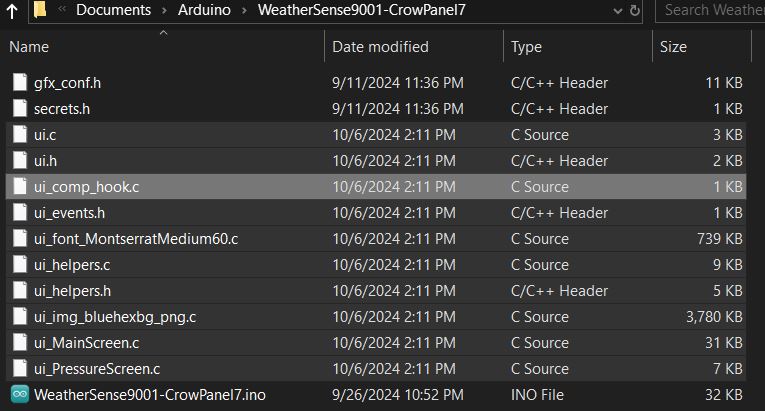
Copy all the .c and .h files exported to the SquareLine project ui_export folder to the Arduino project root folder (where the .ino file is) overwriting any existing files
COPY .c and .h from:
to:
Open the UI_PressureScreen.c source code file (in the Arduino project folder) and insert the following global variable definition line for the chart series below the line include “ui.h”:
lv_chart_series_t * ui_PressureChart_series_1 = NULL;
// This file was generated by SquareLine Studio
// SquareLine Studio version: SquareLine Studio 1.4.2
// LVGL version: 8.3.11
// Project name: WeatherSense9001-CrowPanel7

#include "ui.h"
lv_chart_series_t * ui_PressureChart_series_1 = NULL;

void ui_PressureScreen_screen_init(void)
{
    ui_PressureScreen = lv_obj_create(NULL);
Still in UI_PressureScreen.c source code file, delete the variable definition pointer type designator from the beginning of the line of code:lv_chart_series_t * ui_PressureChart_series_1 =
lv_chart_add_series(ui_PressureChart, lv_color_hex(0xD41318), LV_CHART_AXIS_PRIMARY_Y);
lv_chart_set_axis_tick(ui_PressureChart, LV_CHART_AXIS_PRIMARY_X, 16, 8, 19, 2, false, 50);
lv_chart_set_axis_tick(ui_PressureChart, LV_CHART_AXIS_PRIMARY_Y, 13, 8, 16, 2, true, 100);
lv_chart_set_axis_tick(ui_PressureChart, LV_CHART_AXIS_SECONDARY_Y, 13, 5, 16, 2, true, 50);
ui_PressureChart_series_1 = lv_chart_add_series(ui_PressureChart, lv_color_hex(0xF10B2E),LV_CHART_AXIS_PRIMARY_Y);
static lv_coord_t ui_PressureChart_series_1_array[] = { 0 };
lv_chart_set_ext_y_array(ui_PressureChart, ui_PressureChart_series_1, ui_PressureChart_series_1_array);
Still in UI_PressureScreen.c source code file, enter the value 37 to declare the appropriate array size of the chart series:
lv_coord_t ui_PressureChart_series_1_array[37] = { 0 };
ui_PressureChart_series_1 = lv_chart_add_series(ui_PressureChart, lv_color_hex(0xF10B2E),LV_CHART_AXIS_PRIMARY_Y);
static lv_coord_t ui_PressureChart_series_1_array[37] = { 0 };
lv_chart_set_ext_y_array(ui_PressureChart, ui_PressureChart_series_1, ui_PressureChart_series_1_array);
Now edit the ui.h source code file, and insert the below line at the end of the Screen: ui_PressureScreen definitions:
extern lv_chart_series_t * ui_PressureChart_series_1;
// SCREEN: ui_PressureScreen
void ui_PressureScreen_screen_init(void);
void ui_event_PressureScreen(lv_event_t * e);
extern lv_obj_t * ui_PressureScreen;
extern lv_obj_t * ui_PressureChart;
extern lv_obj_t * ui_Pres1;
extern lv_obj_t * ui_TickLabel6hr;
extern lv_obj_t * ui_TickLabel12hr;
extern lv_obj_t * ui_TickLabel18hr;
extern lv_obj_t * ui_TickLabelNow;
extern lv_obj_t * ui_TickLabel3hr;
extern lv_obj_t * ui_TickLabel9hr3;
extern lv_obj_t * ui_TickLabel15hr;
extern lv_obj_t * ui____initial_actions0;
extern lv_chart_series_t * ui_PressureChart_series_1;
With the above changes made and files saved, you can now attempt to compile the entire project from within the Arduino IDE
