Getting the Arduino ESP32 Integrated Development Environment (IDE) and all the necessary libraries set up successfully for this project can be a challenge. The main issue relates to compatibility of the library versions with each other as well as with the CrowPanel hardware. Simply changing the version of one dependent library to a slightly higher or lower version can render the project inoperable, usually in the form of continuous reboots of the ESP32 or simply a blank display screen.
With that in mind, I will list the versions that I know work at the time of this writing. I suggest starting with these versions as a base, and once working, carefully venture into updating one library at a time as needed.
Projects, videos and instructional blog posts like this take a lot of effort to research and produce. I have over 100 hours in this project so far. If this has been helpful or interesting, please consider a donation to help offset the extensive time and effort I put into these projects. Your support for small creators like me is greatly appreciated. Also, it has been shown that donating will allow much positive karma, fortune and mojo to come your way.
It is recommended to install the tools and libraries listed below in the order shown. Again, make sure the version numbers of each application or library match those listed as they are known working.
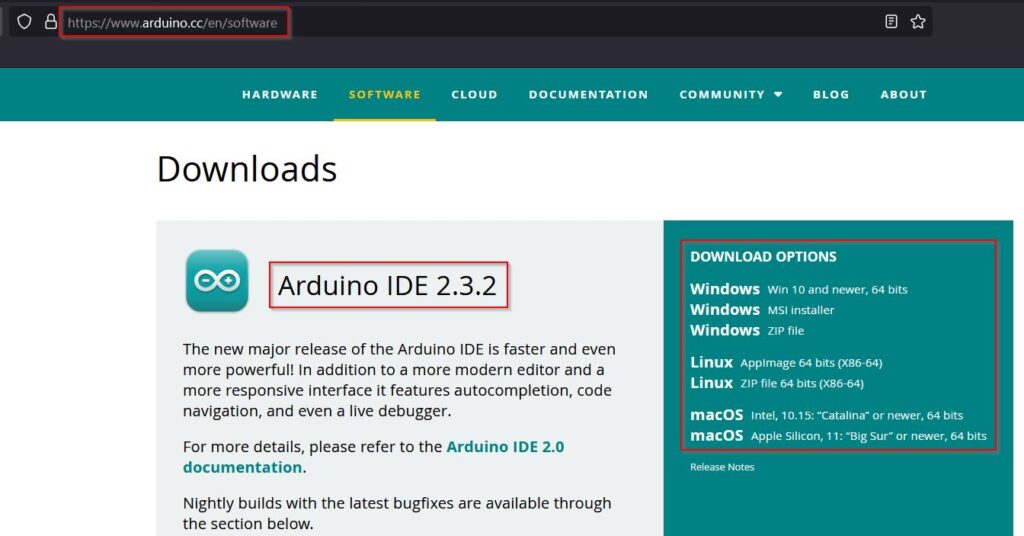
Step 1: Download and install Arduino IDE 2.3.2 from arduino.cc
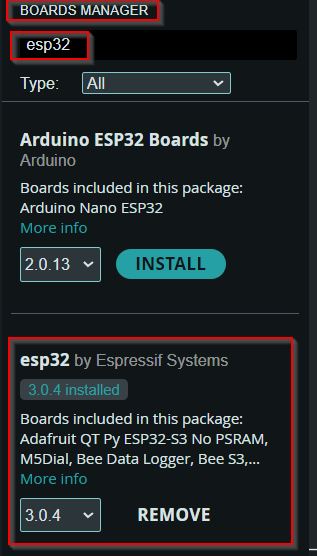
Step 2: From within the Arduino IDE, first click the Board Manager icon on the left panel, then search for and install the ESP32 3.0.4 Board Manager from Espressif Systems
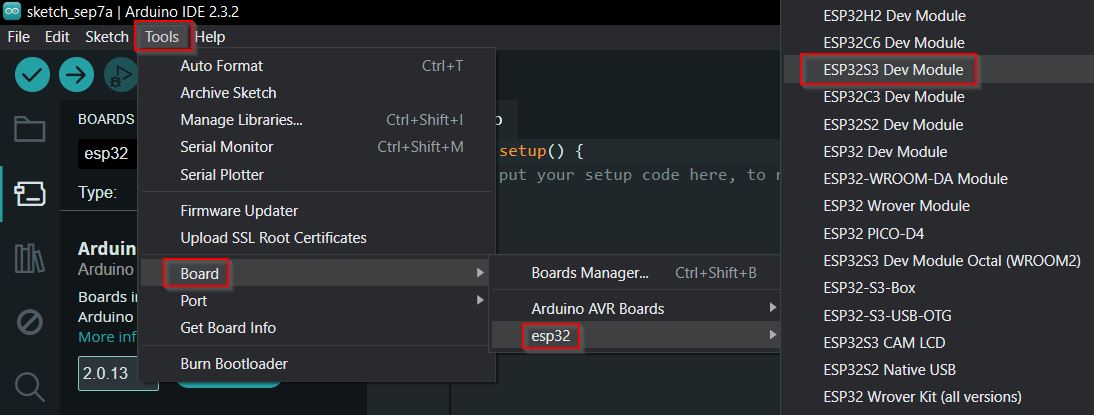
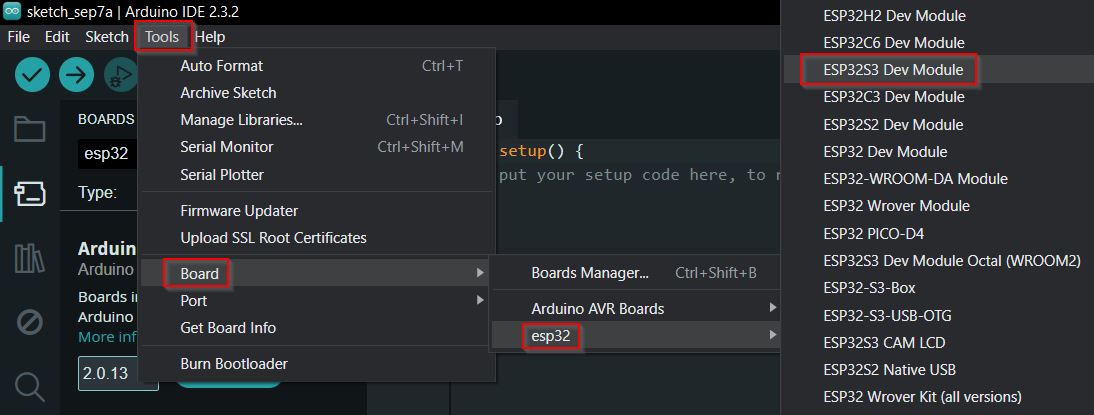
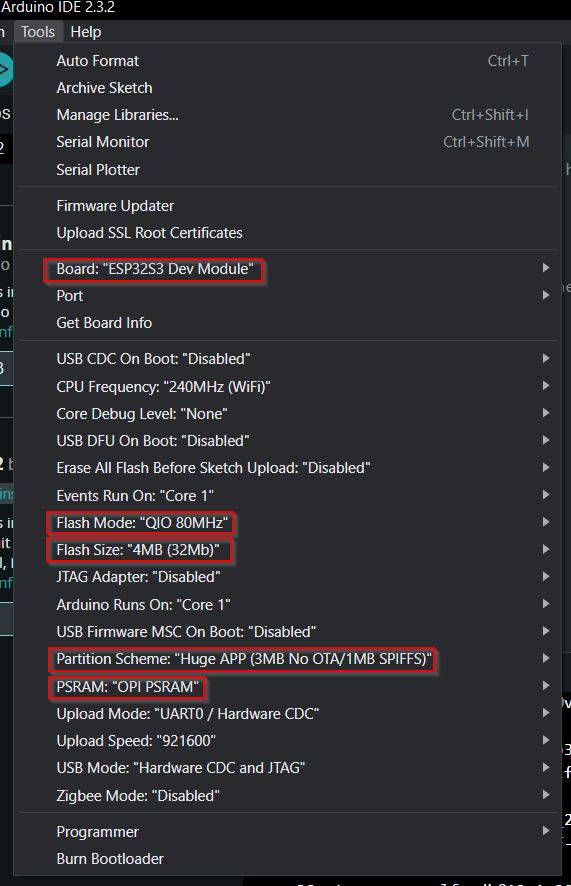
Step 3: From the Arduino IDE menu, choose the ESP32S3 Dev Module by navigating to Tools/Board/esp32/ESP32S3 Dev Module
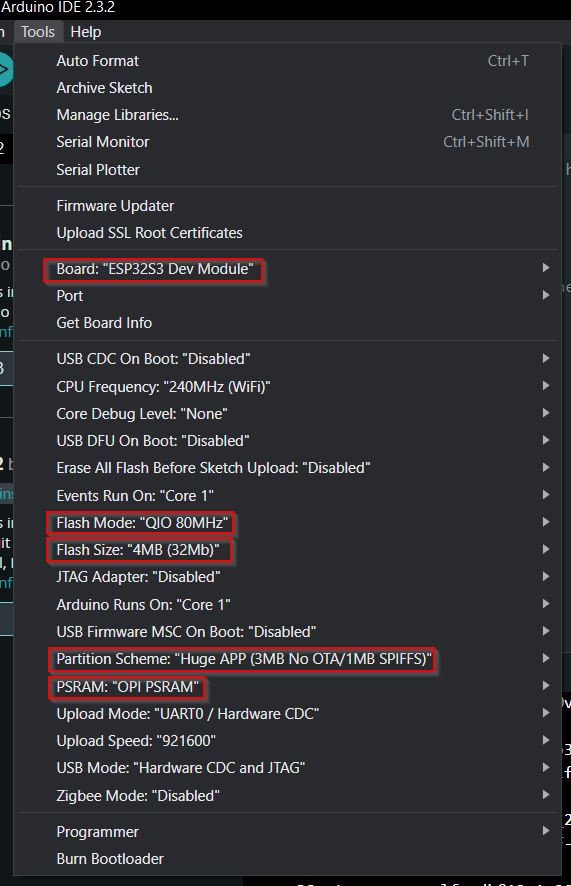
Step 4: From the Arduino IDE Tools menu, assure all settings match those highlighted below
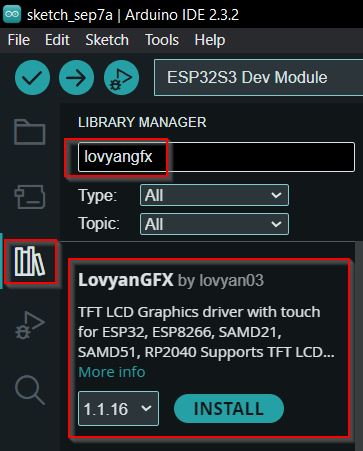
Step 5: From the Arduino IDE, first click the Libraries icon on the left panel, then search and install the LovyanGFX 1.1.16 by lovyan03 graphics library
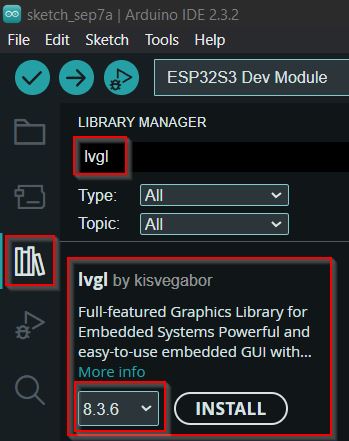
Step 6: From the Arduino IDE, first click the Libraries icon on the left panel, then search and install the lvgl 8.3.6 by kisvegabor graphics library
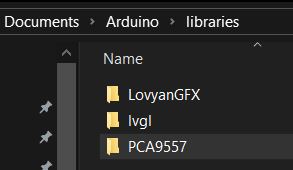
Step 7: From the Windows Explorer, locate and navigate to your Arduino libraries folder (typically C:\Users\<username>\Documents\Arduino\libraries\). Click the button below to download the PCA9557.zip 8-bit I/O Expander library. Do not use any other PCA9557 library found online or in the library manager as it does not seem to work correctly. Extract the downloaded PCA9557.zip files and copy the entire folder structure to your Arduino libraries folder as shown.
If you downloaded the WeatherSense 9001 code base from my Github, the correct PCA9557 library is included there as well.
Note that the PCA9557 library is only necessary for Version 3 firmware of the CrowPanel display. This is typically the 7.0″ CrowPanel displays, but likely all future 5.0″ version of CrowPanel sold will be v3 as well. Check the silkscreen on the CrowPanel board for v1.1, v2 or v3 version designator.
Step 8: Close and restart the Arduino IDE in order to load the PCA9557 library. Do NOT ever arbitrarily update any libraries when the Arduino IDE starts unless you know what you are doing (choose Later). Again, making one simple change to a library version can cause this project not to work with the CrowPanel display.

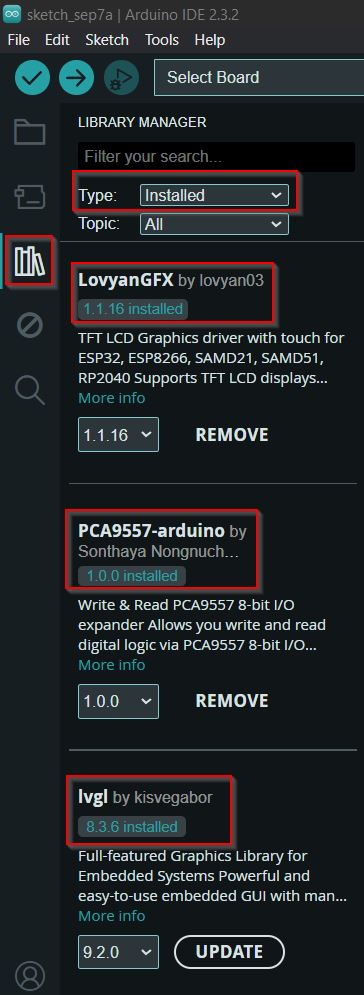
Step 9: After relaunch, you can confirm that the PCA9557 library was installed by chosing the Libraries icon on the left panel then selecting Type: Installed in the dropdown.
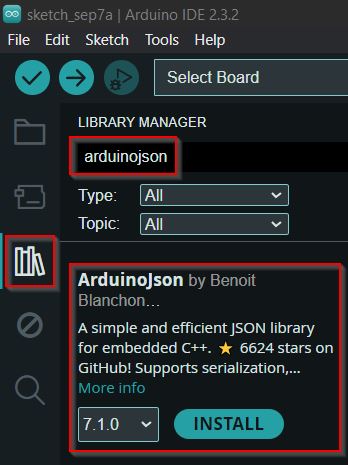
Step 10: From the Arduino IDE, first click the Libraries icon on the left panel, then search and install the ArduinoJson 7.1.0 by Benoit library
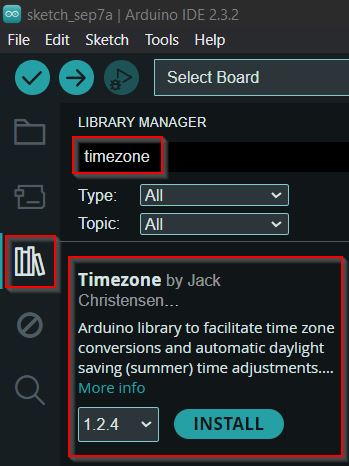
Step 11: From the Arduino IDE, first click the Libraries icon on the left panel, then search and install the Timezone 1.2.4 by Jack Christensen library
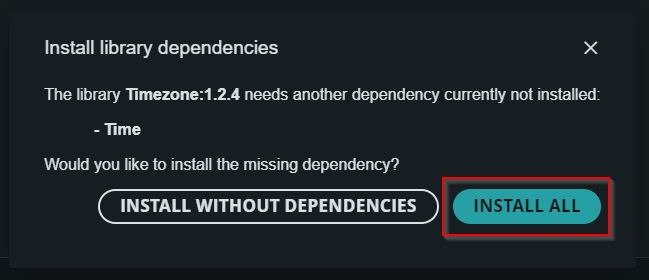
If prompted, Install All library dependencies for TimeZone:
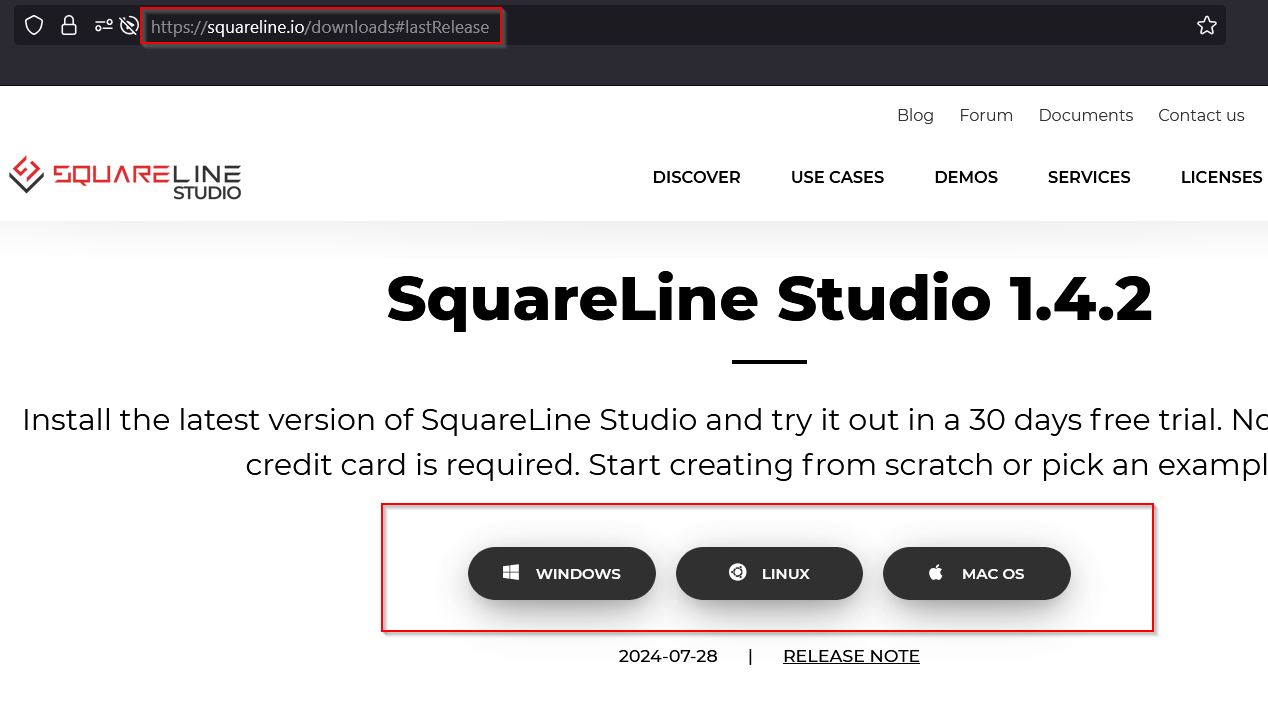
Step 12: Download and install SquareLine Studio 1.4.2 from https://squareline.io/downloads
Register for a free personal license for SquareLine Studio and follow the prompts to launch and log in to the application you installed.
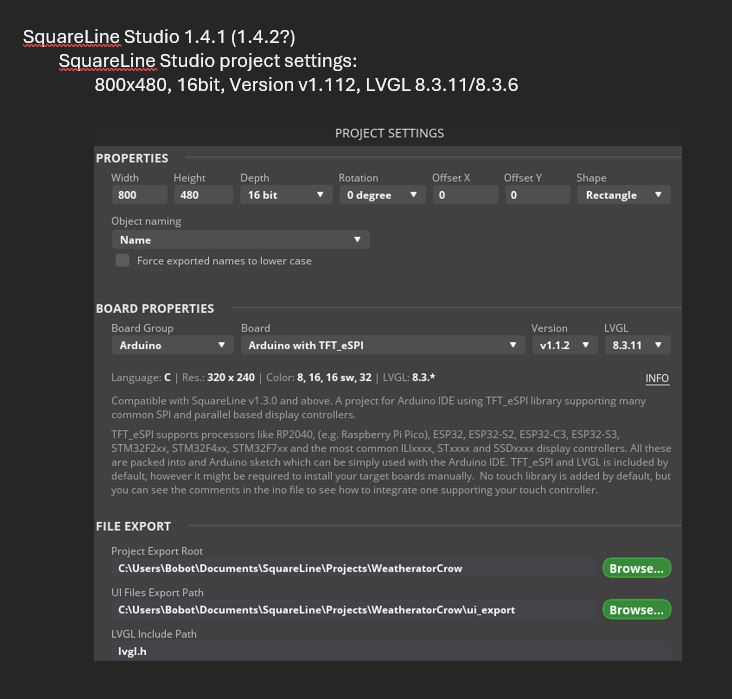
Step 13: Set up your new SquareLine Studio GUI project. Use the settings below exactly as listed for the Crowpanel Displays. Obviously, replace the “Bobot” with <yourusername> in the folder locations listed.
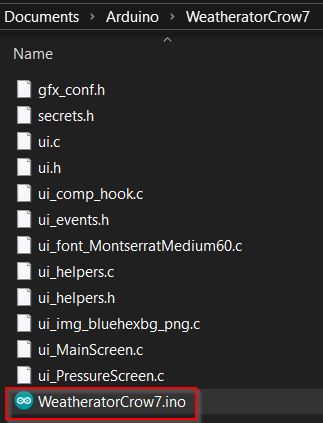
Step 14: It is assumed that you have already downloaded the WeatherSense 9001 code base from my GitHub.
Here’s the link: WeatherSense9001-CrowPanel7 on GitHub
While the name of the .ino sketch may be slightly different, launch the .ino file from my code base.
Step 15: Once the .ino sketch has been loaded, you will have to choose the board and settings again for this sketch.
Step 16: Plug in the CrowPanel display to a USB port.
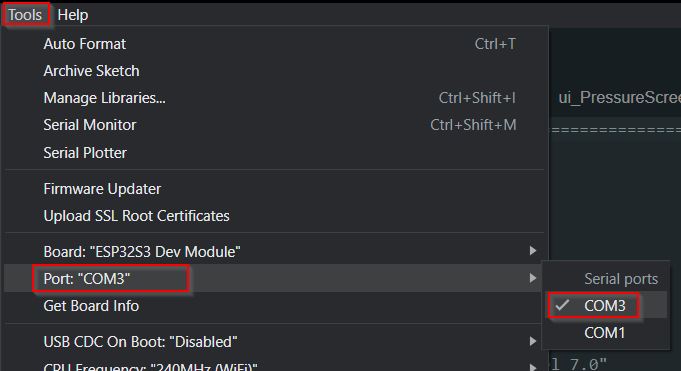
Select the connected COM port.
Set the Serial Monitor in IDE to 9600 baud.
You can attempt a compile at this time. Note that compile can be very lengthy, between 3-5 minutes is not uncommon.
Good luck!
